Simple Calculator
TL;DR
It had been a while since I’d written any serious code, and although I have tried to keep up to date on any changes in web development while I’ve been parenting my son, I wanted to build a few things. Over the years I’ve looked at several lists of projects to build as part of your portfolio or as ways of improving or brushing up on your coding abilities. Building a calculator almost always appears on that list.
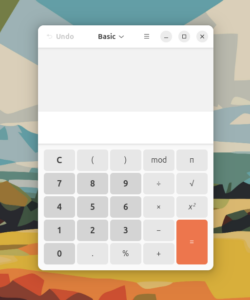
It’s build in HTML, CSS and vanilla Javascript as you’d expect. I use Ubuntu for my operating system so I modeled the look of it on Ubuntu’s calculator shown below.
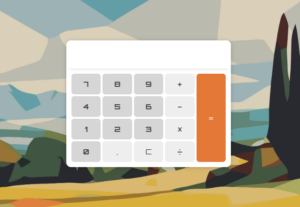
Here’s a screenshot of the one I built.
I deliberately tried to keep the project a little simple. I used a Shunting Yard algorithm to convert the infix equation to postfix notation. After that I wrote a function a walk through the array of the equation, popping off the operands and operator for evaluation and pushing it back to the equation array. You can find this project on my Github account here.
Below you can try out my calculator. I might make this into a custom WordPress shortcode or plugin as that’ll be fun and it’s been a little while since I built one!
Funnily enough, I simply pasted the HTML code for the calculator into the Code tab in the WordPress class editor. It included all the new lines etc straight from VS Code, and behold the styling of the calculator messed up! Despite it not showing them in the Code tab of the editor, WordPress was inserting paragraph and break tags everywhere leading to the mishap. I’ve probably come across this before, but it’s interesting the little challenges you come across.
Thinking about site speed and keeping stuff clean, I enqueued the stylesheet and the script for the calculator only on this post page using an IF statement in my functions.php file, in case you were wondering.
The scope and the why
As mentioned above, building a calculator seemed to feature on a lot of lists of good projects to build when you’re getting in some sort of web or software development. While I have around 5 years under my belt, I hadn’t coded really much at all in my time raising my son and so it seemed like a good project to get me started. I decided to keep it fairly simple. No parentheses or more complicated things. Simple addition, subtraction, division, and multiplication, with a decimal point.
This project was about defining what I wanted to achieve and solving each challenge one at a time to end up with a finished result. It was great getting to write code like this and after a little bit did come back to me fairly quickly.
The build
I started by writing the HTML structure. I used a text input element as the screen (above the buttons) which I set as read only, and the buttons were just button elements. The CSS is fairly straight forward, using CSS Grid to place the individual buttons to fairly closely match the layout of Ubuntu’s calculator application. With some border-radius and padding and a couple of shadows it looked pretty good.
Operator and operand buttons to screen
The first task was to attach event handlers to the buttons. I did that using a For loop, rather than assign each handler separately (less code). The operators and operands triggered the handleButton() function which added the pressed button’s value to the end of the screen’s current string, then adding that new screen value back to the screen (the text input mentioned above). the handleButton() function also checked in with a variable called equationComplete which on page load is set to 0. Later, if an equation has been completed by the script that equationComplete variable changes to 1; the handleButton() function then knows to clear the screen’s value to blank as we’d be starting a new equation. Just like an ordinary calculator.
The “clear” button and the equals button
The same as before, I assigned an event handler to the clear button. It’s a simple function that just clears the screen’s value to an empty string. The equals button would trigger a handleEquals() function that would start the more complex code to evaluate the equation. Initially, I had this handleEquals() function use the eval() function to evaluate the screen’s equation string and place the result back in the screen text input. I knew I’d need to write my own code to evaluate the equation but it was a good proof of concept and that I had a working calculator.
It’s noting at this point that at pretty much every stage I’ve made liberal use of console.log() to check that things are working as they should do before moving on to the next stage.
Converting to postfix notation
So I read a few tutorials, and also generally about calculators and found that postfix notation was used. I hadn’t come across postfix notation before so this was new to me. In my reading I found a Shunting Yard algorithm seemed to be the way an infix equation was converted to postfix notation. I felt that if I focused on a tutorial I would end up essentially copying what they had written. I felt that reading separately about Shunting Yard algorithms and looking at other people’s example I could write my own, problem solving along the way. Although I was still learning from other people and what they had done, I did feel like I was learning more than simply following along with a tutorial that showed you the code from start to finish.
So, first, in the handleEquals() function I split the string into an array. I created a function called toPostfix() which would take the array and walk through it using a For loop. A Shunting Yard algorithm uses two “stacks”, or arrays. One I called outputQueue which is where I wanted the final postfix equation to end up. The second I called operatorStack (it seemed like the typical naming convention is the various examples I saw); the operatorStack would take operators until it was determined they needed to be pushed into the outputQueue. I set an array earlier in the code for the precedence each operator should have. If there was already an operator on the operatorStack then the code checks whether the new operator has equal to or greater precedence and if it does then you pop the operator off the operatorStack and push it to the outputQueue. Once we get to the end of the initial equation array we then pop the remaining operators off the operatorStack and onto the outputQueue.
I’ll be the first to admit, this took a little getting my head around. Some of the simple examples I found of infix being converted to postfix didn’t quite answer the questions in my head so it took a little more reading and looking at more complex examples to get to grips with it. In the work I’ve done before there hasn’t really been any need to use what I’ve thought of as “real algorithms”. But, this was an interesting challenge and this part was certainly the more difficult part.
Walking through the new postfix equation
Next, I created the calculateEquation() function that took the postfix array and used a for..of loop to take each array item from the start and perform the calculation on it. The result is then placed in the calculator’s screen element, just like a real calculator.
In conclusion
Getting to grips with the Shunting Yard algorithm was something new, but I enjoyed the challenge. There’s definitely a few things I would improve on with this little calculator. For example I feel like it needs handling for things like the user hitting the decimal point button more than once, and division by 0 scenarios etc.